

By BiosafePro Editorial Team | Biomedical Waste Management Specialists
BiosafePro is a professional manufacturer and global supplier of medical waste management solutions, including a full range of sharps disposal containers certified to international standards. Our team works directly with hospitals, laboratories, distributors, and procurement officers across more than 30 countries.
In a high-stakes clinical environment, a split-second delay or an awkward reach during a procedure can be the difference between a successful intervention and a life-altering occupational injury. When a clinician finishes administering an injection or withdrawing blood, the clock begins ticking on a high-risk window: the time between instrument withdrawal and safe disposal. If the medical sharps container is not immediately accessible, obscured by equipment, or mounted at an incorrect height, the risk of a contaminated needlestick injury (NSI) escalates exponentially.
For hospital procurement officers, laboratory directors, and medical distributors, optimizing sharps container placement is not merely a matter of convenience—It is a core audit compliance indicator and a safeguard for employee safety. So, are your sharps containers truly in the right locations? Let us examine the clinical data, regulatory standards, and spatial logistics required to build a foolproof containment ecosystem.
Why Does Sharps Container Placement Matter?
The spatial deployment of a sharps disposal container directly dictates a facility’s epidemiological and financial risk profile. Evidence documented in clinical guidelines indicates that a significant percentage of percutaneous injuries occur after use and before final disposal—frequently due to poor accessibility or improper positioning of disposal units.
According to peer-reviewed data published in the American Journal of Infection Control (AJIC) via PubMed, the rigorous implementation of point-of-use, puncture-resistant sharps disposal infrastructure, combined with safety-engineered devices, has drastically dropped disposal-related needle injuries across clinical networks. However, the study heavily emphasizes that removing full units and standardizing container access remain critical to preventing exposure spikes.
Optimizing your container layout delivers five critical institutional benefits:
Reduce Needlestick Injuries
The primary mechanism of engineering controls, as mandated by global biosafety standards, is to minimize the transit distance of an exposed, contaminated sharp. Proper placement ensures that healthcare workers do not have to walk across a room, weave around furniture, or pass an exposed needle to a colleague, drastically lowering the incidence of accidental punctures.
Prevent Accidental Exposure to Bloodborne Pathogens
Contaminated sharps are primary vectors for bloodborne pathogens, including Hepatitis B Virus (HBV), Hepatitis C Virus (HCV), and Human Immunodeficiency Virus (HIV). Immediate isolation of these items within a designated, puncture-resistant sharps container drops the cross-contamination vector to near zero, shielding both clinical staff and environmental services (EVS) personnel.
Improve Workflow Efficiency
Clinical workflows depend on ergonomic optimization. When a medical sharps container is positioned seamlessly within the natural zone of movement (the “point of use”), clinicians can maintain their focus on patient care without interrupting their tactical sequence to locate a disposal box. This minimizes cognitive fatigue and speeds up room turnover rates.
Support Infection Prevention Programs
Modern infection control relies on a combination of behavioral compliance and environmental engineering. By strategically deploying waste solutions, facilities reinforce a culture of safety. This integration is discussed comprehensively in our expert breakdown on sharps containers explained: a guide to types, sizes, and clinical applications, which outlines how choosing the right volume and type correlates with specific clinical settings.
Meet Occupational Safety Requirements
Regulatory bodies maintain strict oversight regarding hazardous waste placement. Non-compliance results in severe financial penalties and compromised accreditation status. Key global standards include:
- OSHA Bloodborne Pathogens Standard (29 CFR 1910.1030): Dictates that sharps containers must be easily accessible to personnel and located as close as feasible to the immediate area where sharps are used.
- NIOSH (National Institute for Occupational Safety and Health) Publication No. 97-111: Provides explicit criteria for the design, selection, and placement of sharps containers, emphasizing line-of-sight and ergonomic positioning.
- ISO 23907-1:2019: Specifies requirements for puncture-resistant, leak-proof sharps injury protection containers.
What Makes a Good Sharps Container Location?
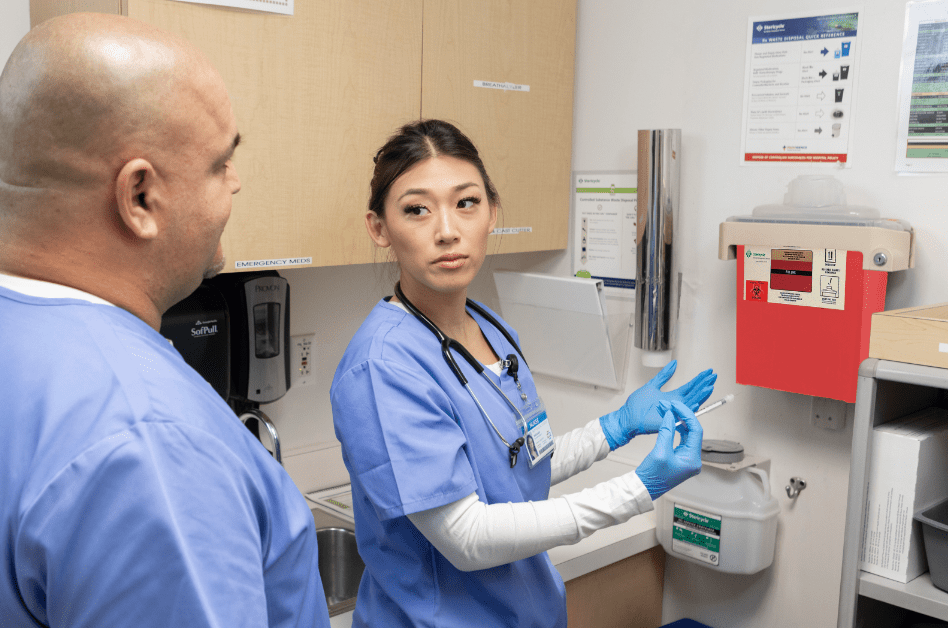
Determining the ideal location for a sharps container requires a systematic assessment of the clinical space. A compliant placement strategy balances visibility, physical accessibility, and structural security.
Is it close to where sharps are used?
The gold standard for safety is point-of-use disposal. The container must be within arm’s reach of the clinician performing the procedure. If a physician or nurse must take more than two steps to dispose of an exposed needle, the container is improperly positioned.
Is the container mounted at the correct height?
Ergonomics dictate safety. According to NIOSH guidelines, for a standing workstation, a sharps container wall mount should position the container’s opening slot between 52 to 56 inches (132 to 142 cm) above the finished floor. This height accommodates the vertical reach of the 5th percentile female and the 95th percentile male healthcare worker, preventing over-reaching or blind dropping. For seated procedures (such as blood collection phlebotomy chairs), the mounting height must be adjusted downward to 38 to 42 inches (96.5 to 106.6 cm).
Is the container always visible?
A clinician must have a clear, unobstructed line of sight to the container’s feed opening and its fill-level indicator. If you cannot see the entry aperture from the treatment zone, the container configuration is hazardous.
Critical Safety Warning: Avoid Placing Containers in These High-Risk Zones
- Behind doors: Opening doors can strike a clinician mid-disposal or obscure the container entirely.
- Inside cabinets: Forces the clinician to use a secondary hand to open a door, breaking aseptic technique and increasing exposure risks.
- Under countertops: Forces blind dropping, where the clinician cannot see if the container is overfilled or if an item is stuck in the opening.
- Around blind corners: Creates collisions between staff members carrying hazardous materials.
Is the container free from obstructions?
Containers must not be blocked by IV poles, diagnostic monitors, waste bins, or patient personal items. A clear perimeter of at least 12 inches around the container housing is highly recommended to maintain a safe approach vector.
Common Sharps Container Placement Mistakes
Even top-tier hospitals frequently falter in execution due to architectural oversights or changes in clinical equipment layouts. Hospital procurement teams must audit for these recurring errors to prevent systematic exposure events, as further detailed in our guide on common sharps disposal mistakes that increase workplace injuries.
1. Mounting only one container for an entire department
Attempting to cut procurement costs by installing a single large container centrally in a hallway or a shared utility room is an invitation for institutional liability. Staff will resort to walking down corridors with exposed stylets and needles, or temporary accumulation on procedure trays occurs, elevating cross-contamination risks.
2. Installing containers too far from patient care areas
When a medical sharps container is placed across the room from the bedside, clinicians are forced to improvise. They may recap needles (a major OSHA violation) or place them temporarily on a bedside table, creating downstream hazards for environmental services staff, visitors, and pediatric patients.
3. Overfilled containers
When a container is filled beyond its designated fill line (typically 75% to 80% of total volume), the safety flap mechanism becomes compromised. Items begin to protrude from the top, presenting an extreme puncture risk to the next user. Placement strategies must include ensuring containers are located in highly visible areas so that EVS staff can monitor fill lines during daily rounds.
4. Choosing convenience over workflow
Often, maintenance personnel mount a sharps container wall mount wherever there is empty drywall space or an existing stud, completely ignoring the operational flow of the nurses and physicians. If the location makes sense structurally but fails clinically, it must be relocated immediately.

Best Locations for Wall Mounted Sharps Containers
Different clinical environments dictate specific spatial dynamics. Procurement officers and facility managers should use the following standardized placement matrix to cross-reference their current deployment architecture.
| Clinical Area | Recommended Placement | Rationale & Regulatory Context |
| Patient Rooms | Near bedside treatment area | Keeps disposal within arm’s reach of IV line access and medication administration zones; must be clear of visitor seating. |
| Emergency Department | Every treatment bay | High-velocity environments require independent disposal infrastructures per bed to prevent cross-contamination during trauma interventions. |
| Operating Room | Near instrument table | Positions the container within the sterile field perimeter, allowing the scrub nurse to safely drop scalpel blades and suture needles immediately. |
| Vaccination Clinic | Beside vaccination station | High-volume workflow demands a container located directly adjacent to the clinician’s dominant hand side for instantaneous dropping post-injection. |
| Laboratory | Adjacent to specimen collection area | Maximizes phlebotomy efficiency; ensures immediate containment of blood collection sets and lancets at the draw chair. |
| Dialysis Center | Near each dialysis chair | High-bore fistula needles demand rock-solid, zero-transit isolation protocols right at the treatment point. |
| Dental Clinic | Beside dental chair | Keeps local anesthetic syringes and endodontic files out of the patient’s direct line of sight but within easy ergonomic reach of the dentist. |
| Outpatient Clinic | Every examination room | Standardizes room setup; prevents staff from transporting contaminated sharps across public facility corridors. |
Wall Mounted vs. Portable Sharps Containers
Selecting the right housing modality is an essential component of a successful facility procurement strategy. Organizations must weigh structural permanence against mobility needs. For an in-depth framework on making these programmatic purchasing decisions, consult our strategic manual on what buyers should know before choosing a sharps container.
Wall-Mounted Sharps Containers
Wall-mounted sharps containers remain the preferred engineering control solution for fixed treatment environments due to several distinct structural advantages:
- Save Workspace: By leveraging vertical wall space, they keep valuable countertops clear for sterile preparation and diagnostic equipment.
- Stay in Consistent Locations: Staff develop muscle memory. Knowing exactly where the container is without looking minimizes operational latency during crises.
- Reduce Accidental Tipping: Securely locked inside a heavy-duty wall bracket or cabinet, these containers cannot be knocked over by patients, children, or busy staff members.
- Improve Accessibility: Maintained at an engineered, standardized height, they remain optimally accessible to all authorized clinical operators.
- Support Standardized Safety Protocols: Simplifies the facility-wide training, inspection, and auditing protocols for infection control teams.
Portable Sharps Containers
While wall units are ideal for standardized spaces, portable sharps containers fulfill critical functions in fluid or dynamic healthcare environments. They are specifically suited for:
- Mobile Healthcare Teams: Home health nurses, phlebotomy carts, and rounding physicians who require transportable biohazardous waste isolation.
- Ambulances and EMS Vehicles: Spaces where structural shifting occurs constantly, requiring containers to be secured via specialized vehicle brackets.
- Temporary Vaccination Clinics: Drive-through clinics or gymnasium-based public health deployments where permanent walls are unavailable.
- Home Healthcare: Providing safe, puncture-resistant disposal solutions for chronic disease management (e.g., insulin-dependent patients) within residential settings.
- Outreach Programs: Needle exchange networks and remote field clinics operating outside standard institutional settings.
A Quick Placement Checklist
Use this definitive compliance checklist during your facility’s next safety walk or infection control audit:
- Located at the point of use: Is the unit within arm’s reach of the immediate procedure zone?
- Clearly visible: Can the clinician see the input aperture clearly without any visual obstructions?
- Easily accessible: Can the container be operated with a single hand without reaching around obstacles?
- Mounted securely: Is the container locked into a specialized bracket or wall cabinet to prevent unauthorized removal or tampering?
- Free from obstructions: Are there any carts, cords, or equipment blocking physical access to the zone?
- Not above eye level: Is the feed opening below eye level for a standing or seated clinician to prevent blind-drop hazards?
- Not below knee height: Is the container mounted high enough to prevent bending or accidental kicking?
- Away from public traffic areas: Is it positioned away from main corridors where guests or pediatric patients could tamper with the unit?
- Replaced before reaching the fill line: Is there a clear protocol to swap out the unit when it hits the 75% fill indicator?
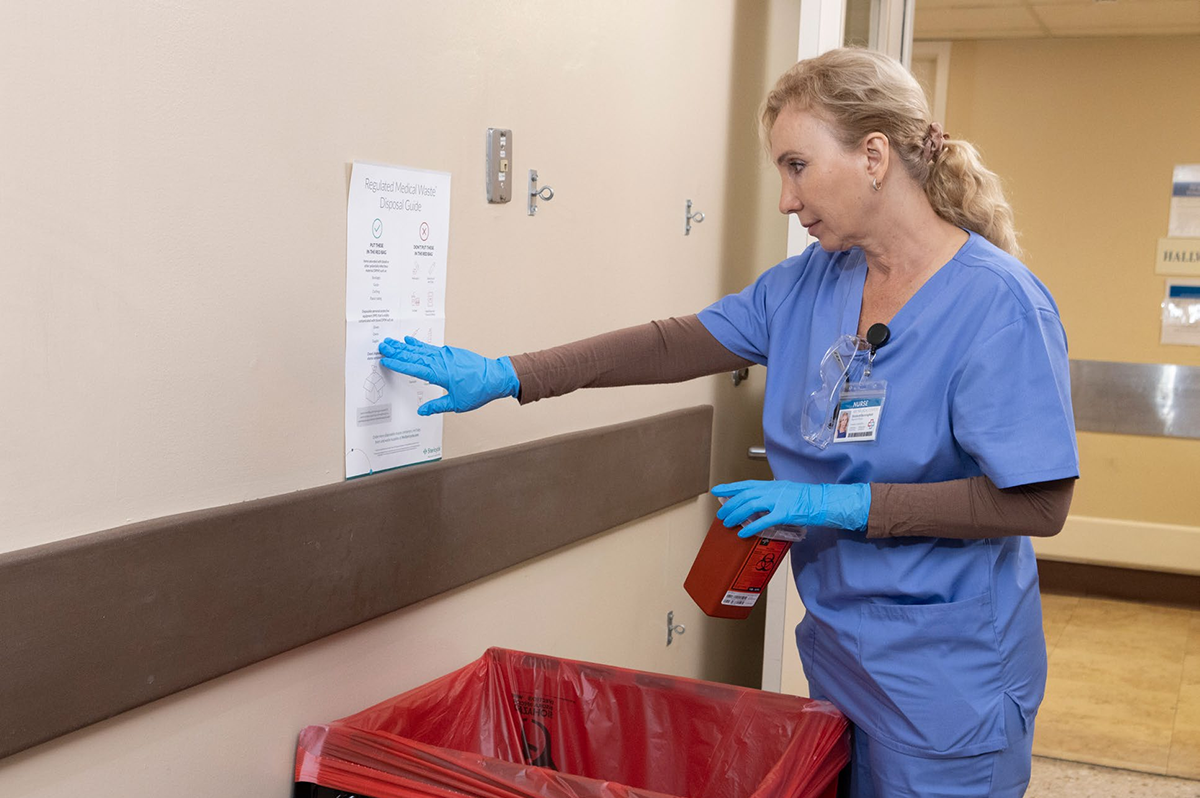
How the Right Placement Improves Safety and Efficiency
Implementing a rigorous, evidence-based approach to your facility’s sharps container placement strategy delivers dividends that go far beyond basic regulatory compliance.
From a clinical standpoint, it significantly reduces the statistical probability of needlestick injuries, protecting your frontline personnel from physical and psychological trauma. Economically, a single NSI can cost a hospital anywhere from $500 to upwards of $5,000 in baseline laboratory testing, counseling, and prophylactic medication—climbing to over $100,000 if a serious infection occurs. Proper placement mitigates this immense financial liability.
Furthermore, optimized positioning improves staff confidence, streamlines clinical workflows, and drastically increases the efficiency of environmental services during facility swap-outs. By eliminating guesswork, you cultivate an airtight ecosystem of biohazard management, ensuring your healthcare facility remains safe, compliant, and structurally optimized for patient care.
التعليمات
Where should a wall-mounted sharps container be installed?
A sharps container wall mount must be positioned at the immediate point of use, within direct line of sight and arm’s reach of the procedure area. Mechanically, the feed opening should be installed between 52 to 56 inches above the floor for standing clinicians, or 38 to 42 inches for seated applications, ensuring compliance with NIOSH guidelines.
How many sharps containers does a hospital need?
There is no singular, universal number; the volume is determined by clinical activity density. OSHA dictates that containers must be placed in all areas where sharps are used. As a baseline rule, every individual patient room, emergency bay, operating theater, and laboratory draw station requires its own dedicated medical sharps container to ensure absolute point-of-use availability.
Can sharps containers be placed on countertops?
Yes, but only if they are safely engineered for countertop use. They must be weighted, stable, or locked into a countertop stabilizer base to prevent tipping. Countertop units should never be placed near edge lips, sink splashes, or cluttered prep spaces where they could be knocked over or contaminate sterile fields.
When should a sharps container be replaced?
A sharps disposal container must be permanently sealed and replaced once waste reaches the manufacturer’s designated fill line, which is typically 75% to 80% of its total volumetric capacity. Allowing a container to fill past this point completely compromises its integrated safety flaps, exposing staff to immediate puncture vectors.